Showing posts with label style. Show all posts

Monday, July 29, 2019

Yes You Can Wear Gingham // Lazy Girl Fashion

Hello There Friends! I hope that you are all having a fantastic start to your week! I'm going to keep up the "yes you can wear" posts, so let me know if you are into that... or not so much! :) This time around I'm talking about gingham.

This print has been especially popular lately, but I always felt like it was a little bit too preppy for my personal style. However, I think you just need to find the right piece for you!


This face = v. excited about adult summer reading at my library... LOL
Tips for Wearing Gingham:

1) Assess Your Style: Is your style preppy or traditional? If so, you can pull off quite a bit of gingham. If not, you may want to try a smaller piece or accessory.
2) Pick a Color That Works With Your Wardrobe: Picking baby pink gingham if you usually wear dark colors or neutrals might be a shock to the wardrobe. I chose navy and it mixes and matches so well with my usual darker colors and with the brighter colors I most often wear. If you are looking for more color in your wardrobe, go ahead and look for something bright.
3) Accessorize: One of my favorite ways to try out a trend is with an accessory. That way I'm not out a lot of money if I don't like it, and it is often small enough to work into your wardrobe regardless.

Here are a few gingham items that I really love*:


1) Headband - Modcloth, $9
2) Gingham Bell Sleeve Top - Draper James, $98
3) Gingham Swim Suit - Unique Vintage, top $23, bottom $26 - also in plus
4) Gingham Midi Dress - Modcloth, $64.99
5) Gingham Jumpsuit -  Unique Vintage, $44
6) Gingham Top - Old Navy, $24.97
7) Gingham Heeled Sandal - Draper James, $248


*These are all pretty neutral, but these sites also have a lot of gingham in fun colors. Old Navy has a lot of yellow, Unique Vintage has coral and red, and ModCloth has all kinds of colors!

What do you think? Do you like gingham?

Let me know if you are liking these posts or not in the comments! :) 

XO,

Alexandra

Wednesday, July 17, 2019

Yes You Can Wear Overalls // Lazy Girl Fashion

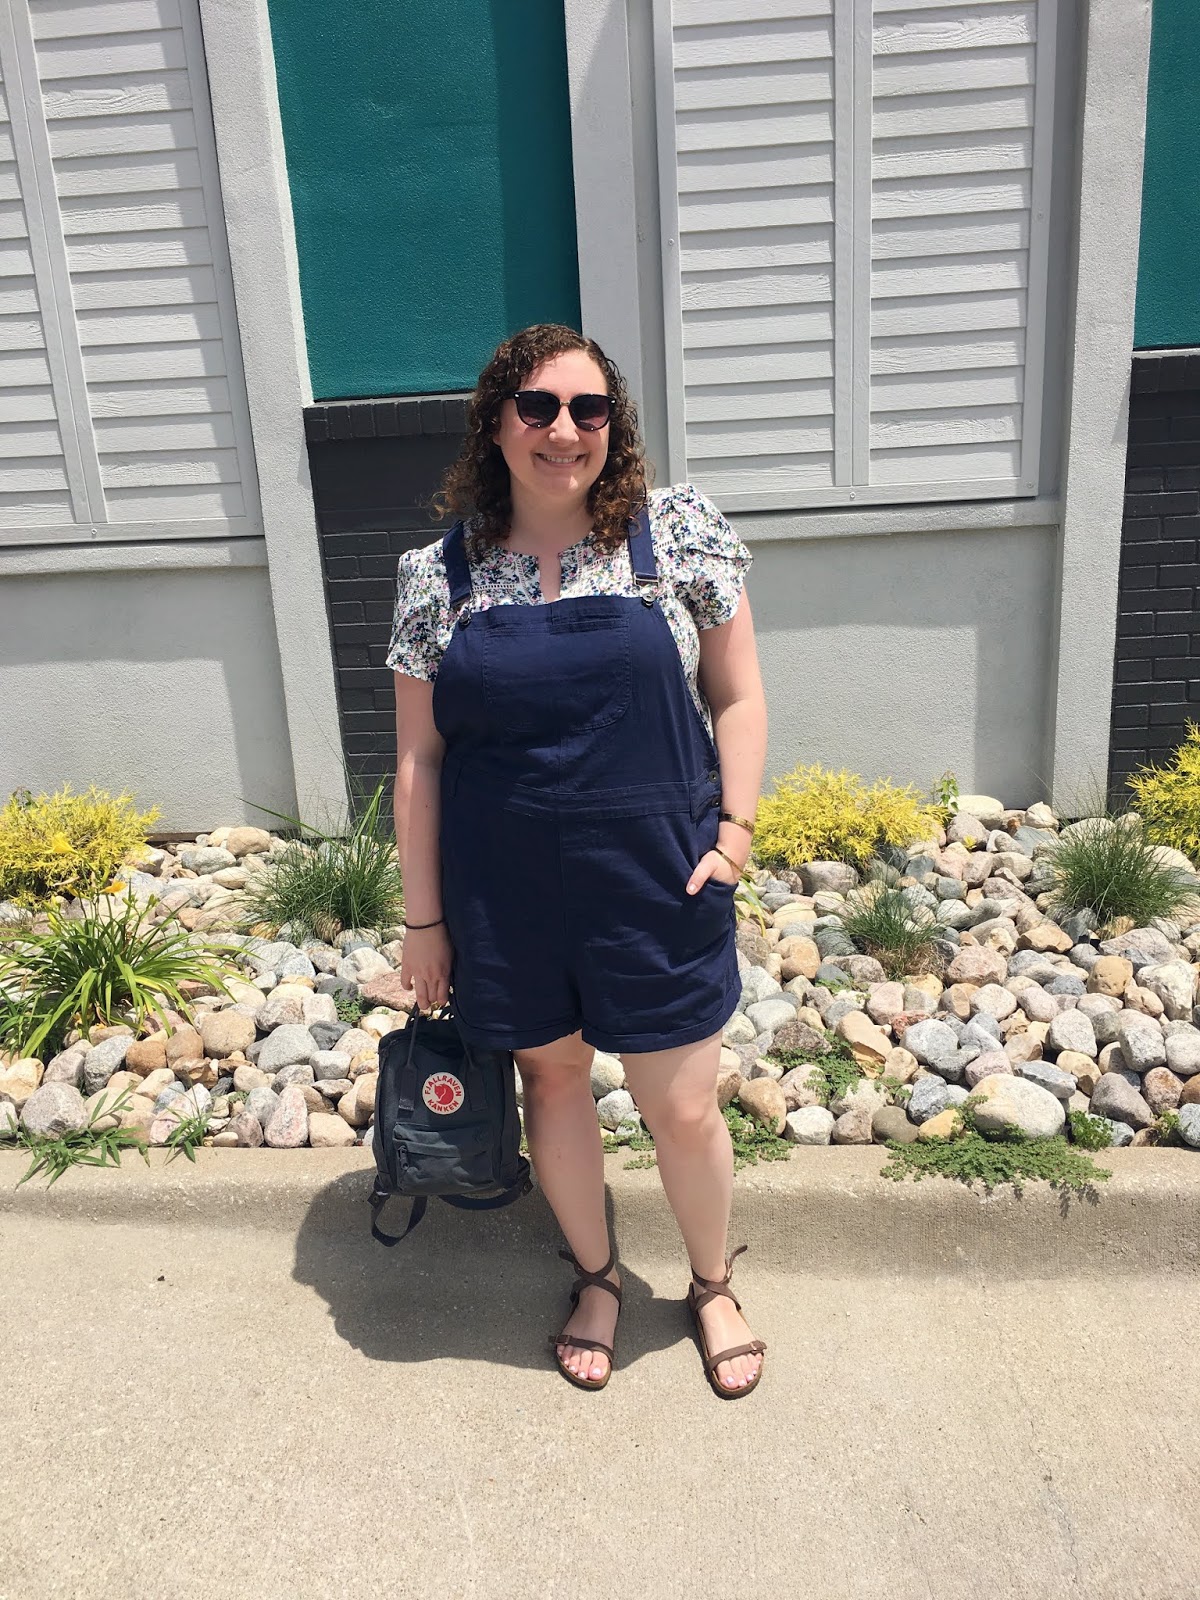
Hello Friends! If you follow me on Instagram, you'll know that I'm a little bit obsessed with my overalls. I found a great pair from Modcloth that aren't super stretchy or fitted and I am kind of living in them!


excuse the streaky mirror. :P 


Here are my tips for pulling off overalls!

1) Pick a Neutral Color - you know what goes with your closet. For me I was looking for either black or navy in a wash that wasn't going to seem too trendy. These solid navy ones were just perfect. However, if your wardrobe is mostly neutrals, you might want to go for something fun like this mustard pair.
2) Pair with Contrasting Colors - If your overalls are dark, wear lighter shirts underneath, if they are light, pick darker shirts. Easy peasy!
3) Bonus Points for Patterns - Adding a shirt underneath with a fun pattern, or even texture makes your outfit even more interesting. I love wearing stripes and floral patterns in light colors under my navy overalls.

Extras: Consider shorts overalls, regular length overalls, skirt/overall jumpers, and non-denim fabrics too. If you expand your definition of overalls you will definitely have more luck picking what is right for you and your closet!

What do you think? Do you own a pair of overalls?

I am considering buying this overall dress/jumper. I think it will be SO CUTE for fall!

I am not being sponsored or getting any payment for sharing this link, I simply adore these! However, if you want to purchase from Modcloth, please feel free to use my referral code for 20% off $75 or more! :) And if you were curious, they make returns super easy, which is a must for me in the online shopping world!

XO,

Alexandra

Wednesday, April 10, 2019

12 Ways to Add Coral to Your Wardrobe! // Pantone Color of the Year 2019

"Living Coral" is the Pantone color of the year. I've heard mixed opinions from people on how exciting (or not exciting) it is. Personally, I like coral quite a bit! It wasn't anything too "out there" for the color of the year. *shrugs* I'm not complaining about it! :) If you guys don't know Sarena she is a color consultant (cool!) and I just love her blog! We decided to join together and share some fun ways to add coral to your wardrobe.

Several things are true of my own personal style:

1) I want to be comfortable.
2) I like to wear pops of bright colors, rather than head-to-toe rainbow hues
3) I like to find inexpensive items to round out my wardrobe - I've been known to splurge, but only on key pieces.

I hope that this gives you some ideas for how to add a little bit of coral to your everyday wardrobe.... without feeling like a neon sign, compromising comfort, or breaking the bank!


1) Fjallraven Kanken Mini Backpack - Fjallraven, in peach pink, $70.00 - I have this bag in navy and I have been so happy with it! Especially great for travel or if you have kiddos!
2) Coral Resin Bracelet - Sugarfix via Target, $14.99
3) Polka Dot Button Up Blouse - Unique Vintage + Pantone, $68.00 (in plus also!)
4) Woven Tank - Aerie, $25.00 - I would wear this with a black blazer and dark skinnies.
5) Watermelon Keds - Keds via Modcloth, $69.00*
6) Coral Bow Bell Sleeve Top - LC Lauren Conrad for Kohls (in petite also!), $32.99
7) Faux Suede Knotted-Twist Slide Sandals - Old Navy, $14.00
8) Coral Sunglasses - Aerie, $15.95
9) Cashmere Travel Wrap - White and Warren, $219.00 (a travel wrap is always on my to-invest list!)
10) Gingham Swing Skirt - Unique Vintage + Pantone, $78.00 (in plus also!) - I would wear this with a graphic tee.
11) Birkenstock Arizona Eva Sandals - Birkenstock via Aerie, $39.95 - I bought traditional Birks last year and now SWEAR by them! BONUS: I have heard that these "water friendly" ones are GREAT for the pool and vacation. Hello... THEY FLOAT! Yesss.
12) Coral Nail Polish - Essie, $8.99 - this color doesn't look coral, but I promise that it is!

Colors to Pair with Coral:


There you have it, 12 items to add to coral your wardrobe! I would personally wear coral with mostly neutrals, especially utility green, and navy!

I hope that you enjoyed this post! Hop on over to Sarena's page and check out her coral picks! While you are there find out what season you are! I am a Clear Spring. I'd love to have her do a full color analysis for me someday! Bday gift. Cough. Cough. :) 

Do you like coral? Do you have some in your closet?

Are you a color lover, or do you use it more sparingly?

XO,

Alexandra

*I am not being sponsored or getting any payment for sharing this link, I simply love to shop with Modcloth! However, if you want to purchase from their site, please feel free to use my referral code for 20% off $75 or more! :) And if you were curious, they make returns super easy, which is a must for me in the online shopping world!

Thursday, August 30, 2018

My FAVORITE Velvet Dress Three Ways

Sooo... I'm ready for fall....

I know a lot of you commented last fall that you would love to add velvet to your wardrobe, but aren't sure how. I am still loving the velvet trend, and it's not going anywhere! (REJOICE!)

I have a few tips, which I guess I should post :P, but I thought that I would share this post first. A fairly basic velvet dress can be dressed up or down very easily, especially in the cooler months!

Here are three of my go-to looks for this burgundy velvet dress! (IT NOW COMES IN BLACK TOO!) :) It is stretchy, comfortable, flattering, and looks good with EVERYTHING.

I am not being sponsored or getting any payment for sharing this link, I simply adore the dress! However, if you want to purchase from Modcloth, please feel free to use my referral code for 20% off $75 or more! :) And if you were curious, they make returns super easy, which is a must for me in the online shopping world!

All right, let's gooo!

Casual:


I love how the dark neutral color allows me to mix and match with my everyday basics like my favorite utility jacket, black tights, my Sam Edelman booties, and a fun pom pom scarf!

Cozy:


Chilly days call for an oversized cardigan, a knit scarf, tights, and my uggs! I love that this dress is stretchy and sooo comfortable! I feel like I'm wearing pajamas, but it's professional enough to wear to work or cute enough to meet friends!

Dressy:


Lastly, this dress is perfect for special events! Especially during the holidays! Adding some sparkly jewelry, or an embellished cardigan helps me feel so polished! My sister even borrowed this dress for her husband's work Christmas party last year! I've also dressed this up with patterned flats and my burgundy moto jacket that has pretty rose gold hardware!

There you go, three ways to wear my favorite velvet dress

How do you feel about velvet?!

Do you have a dress that you can dress up or down for any occasion?

I am not being sponsored or getting any payment for sharing this link, I simply adore the dress! However, if you want to purchase from Modcloth, please feel free to use my referral code for 20% off $75 or more! :) And if you were curious, they make returns super easy, which is a must for me in the online shopping world!


XO,

Alexandra

Wednesday, August 23, 2017

Introducing Lazy Girl Fashion

Happy Wednesday, Friends! I hope that your week has started off well.

Today I'm talking about something that I don't chat about much... fashion.


You know those women who look perfectly pulled together at all times? Just gorgeous from head to toe, but make it look effortless. I am NOT one of those women. Don't get me wrong, I am generally pretty happy with myself. I don't curse at the mirror or pick myself apart frequently.... but I would not consider myself a make up, fashion, hair, etc. etc. guru. I also have a hard time getting my nose out of a book or my project life pages... And if my outfit is cute, my hair probably needed washed the day before if you get my gist....

But there are some simple things that DO help me feel and look more pulled together, without trying too hard. And I can usually manage it alongside my reading and paper crafting. I call it Lazy Girl Fashion. I may also have some posts coming related to keeping your sh*t together around the house, schedule-wise, etc. that will probably be called Lazy Girl Life.

Upcoming Posts:

10 Ways to Look and Feel More Pulled Together
Ways to Beauty Multi-Task
My Closet Basics
Next Level Accessories
How to Travel with Just a Carry On
My Stupid Easy Outfit Method
My Fool-Proof Outfit Formulas

So there you have it, a new "series" coming your way. 

Let me know if there is anything in particular that you want to see a post on. :) 

Are you into fashion? 

Does it depend on the day how "put together" your appearance is?

Anybody else who'd rather read than master trends and contouring? :P 

XO,

Alexandra

Monday, January 4, 2016

12 Quick Things You Can Do to Start the Year Organized // New Year State of Mind

Hi everyone! Happy 2016!

I hope that you all had a lovely NYE, KC and I had a really nice anniversary together. :)

I've noticed a lot of New Year negativity online this year, so if that's you, feel free not to read! I'm really into it, so I've got a lot of New Year posts planned!

It's the first full week of January 2016! I've been thinking a lot about goals (I'm still working on them!), but I've come up with a lot of mini tasks and projects that are going to make my year a little easier from the get-go. Interested? Read on.

Start the first full week of the new year off right. These 12 easy tasks can help you feel more organized and less cluttered right away. Do 2 per day, or more on a weekend, I guarantee you'll feel lighter. 


These brushes get used daily. They get GROSS y'all. They carry bacteria, they can disrupt the colors you are using at the time. Just give them a quick clean. I love Ursula's tutorial for a natural makeup brush cleaner. In a pinch? Rub them against a baby wipe!

Extra Credit: Take inventory of your products, anything you need to order soon? Toss anything that's REALLY old. There are dates for these things... follow them if you'd like. But I don't use my makeup quickly enough to do that!!


One of my goals for the year will be related to cooking at home more. Whether you cook a lot or not, it's easy to forget about your fridge. Take 10 minutes to toss out old condiments, dispose of moldy leftovers, and take note of what you have in your fridge. Make a list of things you need to re-stock or add. Repeat with your freezer and pantry.

Extra Credit: Wash those shelves and drawers. Even check out the spices etc.


I don't know about you guys, but being a #fulltimefulltime (full time 9-5, full time business of my own) I carry a TON of stuff around every day. By mid-week the bags start to get CRAZY. Take 5-10 minutes to dump them out, toss the trash, recycle anything you can, take stock of what you need to add, and anything you've forgotten about (hello, letter or bill you meant to mail. I'm also looking at you overdue library book....). Make your piles, reduce what you're carrying, restock what needs restocked, and feel so much better. :)

Extra Credit: Make a mini emergency pouch. Get a small zipper pocket and fill it with pain relievers, chapstick, bandaids, hair ties, nail clippers, etc. It doesn't have to be very big, but having that stuff handy can be great. No mid-day runs to CVS for you!


Every. Three. Months. I know that we don't all do this enough, so start the year off with a brand spankin' new toothbrush. Easy peasy.

Extra Credit: Check your other supplies... floss, toothpaste, etc. Restock. If you feel like getting really crazy... take stock of shampoos, soaps, lotions, and other bathroom essentials. Add them to your list!


I don't know about you guys, but KC & I's car gets messy QUICK! And it's small, so we run out of space quickly too. Take 20-30 minutes to clean out your glove compartments, any door bins, under seats etc. Get all of the trash and recycling out of there! Make sure your proof of insurance is in the glove box with all of your other necessary paperwork. Pens, coins, etc. should be restocked as needed. Donate the miscellaneous donation items, bring in any clothing, etc. This will make you feel so much better!

Extra Credit: Take it to a carwash and use the quarter vacuums to vacuum the floors, mats, seats, etc. So. Clean. In the winter... you may or may not actually want to get your car washed. Lucky you if you have a garage/shop vac! #adulting


When was the last time you cleaned out your underwear drawer? Seriously? If it has holes, bad elastic, stains, doesn't fit well, isn't comfortable.... GET IT OUT OF YOUR LIFE! Unless it is a pair not meant to be functional, *wink* it should be comfortable to wear, and decent in appearance. You do not have to wear granny panties if you don't want to either! I am a big believer in comfy + cute. Hanky Panky anyone? (seriously, I would die if I could just wear these every day. $$$$$$). Make replacements as needed. You are worth it. Undie PSA over.

Extra Credit: Bras y'all. Bras. (go get fitted, wear the right size. it will change your life). Bra PSA also over.


Library fines? Pay them. Parking ticket? Pay that too. Late bills or payments? Make those suckers ASAP. One less thing to worry about or remember later on.

Extra Credit: If you can swing it, pay a little extra somewhere this month. Pay double your student loan payment, debt payment etc. Starting with a leg up can be a good thing. Again, only if that is something you can do right now!


Go through those paper piles. You know the ones I mean. Junk mail, mixed with real mail, mixed with chaos. Get those, sort them, recycle/shred that stuff! Junk mail is obnoxious and it creates 10 BILLION pounds of solid waste every. year. That's ridiculous. For free, you can sign up to stop receiving junk mail, here. Totally Brill. Write "return to sender, change of address" on mail that is not yours, junk or not. Put it back in the mail box. Recycle old catalogs, magazines, etc. while you are at it! And please do consider recycling. It really does make a difference.

Extra Credit: No one likes a full inbox. Go through and delete old emails, delete them in chunks by business / email address to get rid of a lot at once. Do this for work, for personal etc. Even go through your folders in your inbox and get rid of the old stuff. A clean inbox is a happy inbox. Unsubscribe from email lists you no longer use! There's no need to have a cluttered inbox!!


Return those duplicate or off-base holiday returns. Many retailers will exchange without a receipt for store credit. Major retailers like Target and Walmart make it especially easy. Take the bag of things you meant to return or exchange and actually do it! Put it in your (newly cleaned?) car so you will remember!

Extra Credit: Take your excess plastic grocery bags while you're at it! Stores like Target and Walmart have bins near the entrances or customer service to collect and recycle plastic shopping bags! You can also take batteries, old cell phones, etc. to these places often. Best buy has even more recycling services. :)


I try my hardest not to throw things away. I recycle what I can, buy used when it's a good option, and I make sure to pass along or donate my old clothes and home items. However, I usually end up with little piles and boxes across the house that need donated. Take 10 minutes to gather it up and put it in the car. Take it to Goodwill, The Salvation Army, etc. Those yellow clothing donation bins are also great! Getting those little things out of the house can totally help you feel less cluttered and more organized.

Extra Credit: Do a sweep through each room of your house. Pick up anything that isn't useful or beautiful in your life, and add it to the donation pile before donating. I bet you'll find at least one thing in each room. Another good place to look is the bookshelf. I resolved in college to only hang onto the books that I LOVED. Since then I have been hoarding books and not reading a ton of them...  but when I do read one, and it's just OK, I sell it to a bookstore or donate it when I am done. Do you need to hang onto a book you didn't even like? Samies for DVDs/Blurays.


Odd socks are a fact of life. If your pile is like ours it grows throughout the year and is never empty. Take the time now, to sort through them again. Match what you can, toss what is wasted (or reuse it as a cloth for dusting, furniture polishing, or surface cleaning), and give the missing ones one more chance. If the mates don't turn up during your next day of laundry. Reuse or toss them! Anything else lying around? Almost empty detergent bottles? Use them up next load and recycle the container. Broken clothespins? Get rid of them! Take stock of what you have and what you need to replace!

Extra Credit: Vow to lessen your budget and get rid of another container in your laundry room by making re-usable dryer balls. They still eliminate static, and can fragrance your clothing if you add drops of oils, AND they lessen drying time. It's better for your bills, the earth, your clothing's lifespan, and they take up less space. I followed this tutorial, and we haven't bought dryer sheets in 6 months! Let's not even get into the nasty chemicals inside of the dryer sheets... :  /


We recently pulled all of the junk off the front of our fridge. So. Transformative. I took down all of the papers, clips, magnets, coupons etc. I washed the fridge, I donated old magnets, I put up some sticky dry erase boards, and now we are menu, grocery, and calendar planning on our fridge. I put up the magnets I was keeping in a much more orderly way. Now it looks SO much cleaner!! Plus, it's keeping me organized. Another great place to do this is bulletin boards, or by the front door catch all areas. Re-think what is there, and get rid of the excess. You'll feel so much better.

Extra Credit: Use the front of your fridge to "publicly" track other goals as well. Tracking your workouts, weight, budgeting, etc? Put it up on the fridge and you and your hubby, roomie, etc. can keep each other accountable and work together to achieve those goals. :)

What little things are you doing to start the new year out more organized? 

Anyone tried any of these lately? What are your tips?

I would love to hear what y'all are planning for 2016!

XO,

Alexandra

Friday, October 16, 2015

Friday Fancy & Favorites // You May Not Tickle My Fancy!

Hi everyone! How's your week been?!

Mine has been long, long, long. 

On Thursday night KC and I got to volunteer for an international conference that we were hosting. We got to mingle, have cocktails, a dinner, and then see a fun show. We met two very nice men from Denmark who loved our city and were especially fond of all of the squirrels. 

It was really fun. Had I been less busy with work tasks I would have loved to volunteer more during the week. Kind of a bummer.

Anyway, we dressed up for the event, and we looked pretty good... if I do say so myself... so here you have a sorta-kinda fashion post. ;) 

This skirt is so so so so so so fun to wear! I highly recommend!

t-shirt: H&M, $20
skirt: Target, Clearance, $12
flats: Target, $20(?)
necklace: TJMaxx, $16
bracelets: Jeweled Gypsy Truck, $30?

Total: $98
Recent Total: $52


KC looking dapper. He may or may not be growing his hair out.

Maybe or maybe not for his Halloween costume. Maybe or maybe not for a man bun. 

hehe


We had so much fun!

I'm so excited to see Celtic Woman with him next week.

This may or may not be my 7th time seeing them live....


Lastly, I'm going to leave you guys with a link to Flula. Because that guy is ridiculously funny...

Grasshoppings and Fish in Barrel are my favorites, but this one is about Tickling Your Fancy... so there you go. I just love his commentary on the odd things Americans say. I could laugh for hours at these videos. The one about Twerking is pretty hilarious too... 

And as he is German... we've got a very international theme to this post, and no other consistency.. hhaa :) 

If we hung out in person, you would probably hear me making little flula quotes in everyday conversation. bhah

XO,

Alexandra

Friday, September 4, 2015

DIY Wall Collage (On a Budget!) // Labor Day Weekend Project

Looking for a project for your long weekend? Everyone loves a good wall collage, here are my tips and tricks for creating one that is beautiful and balanced.
For YEARS I have been getting blog and Instagram complements on this wall collage. I am always super flattered, partially because I have never posted a picture of the collage by itself. It's always in the background. So, I have decided to give a little tutorial and some tips on making your collage look balanced, but  not matchy-matchy.

This is a detailed post, hopefully that will give you guys specific ideas, inspiration, and steps to take. :) 

Ready?


Time:

A few hours, really as long as you'd like.

Supplies:

A roll of craft paper or old wrapping paper
Scissors
A pencil
Items you might want to hang on the wall
Frames you may want to use
Double sided, acid free, scrapbooking adhesive squares - or something similar
Nails - and any other hanging supplies, (more on this below)
A hammer
A cup of coffee - or whatever you prefer
A good playlist


Getting Started:

Start collecting paper if you don't already have a stack. Postcards, artists prints, magazine pages, small paintings, caricatures, maps, photos, etc. Anything that YOU like would make great wall art.

Start collecting frames, if you don't already have a stack. I occasionally pick one up at a store, but usually I get mine at a thrift store like Goodwill or The Salvation Army. They are usually between $1 and $5. Cheap. Plus you can find a good selection of sizes/shapes/colors/textures there. I only purchased 6 of the frames in this collage from non-thrift-store sources.

Designing Your Collage:

Gather the materials that you are considering using, (frames, paper pieces, canvases, mirrors, plates, anything you love and want to put on your wall). If you are anything like me, you will have way too many options for the collage. That's ok, it allows you to test things out and find the best fit. :)

Pick the space that you want to use for your collage. We had a big empty section in our wall, so we decided to use that. Take a roll of paper (we used craft paper from the gift wrap section at Target) and roll it out until it is the approximate length of the space that you want to fill with your collage. If you want to cover more height than the paper allows, feel free to cut two strips and tape them together to get the correct height.

Lay your piece of paper on the floor, this will be your canvas. You'll need this later.


Now start looking through your items that you want to hang:
  • Are there any paper pieces that go really well with one of your frames? If so, test them out, put them inside and take a look at them. Don't worry about placement yet. Look at things that are the right sizes, shapes, and colors. If necessary you can mat things to make them fit in your frames.
  • Are you noticing any color themes? We often gravitate toward similar colors and palettes. I didn't notice at all until I started narrowing my choices down that I had a lot of green and gold throughout my collage. 
  • Similarly, are there any items that just look completely off in your pile? Set those aside, but don't rule them out quite yet. The variation in items can make it look interesting, but you don't want those things distracting you as you think.
  • Are there any "problem children" in the bunch? Anything that is torn, broken, needs repair, a special hanging solution, or a coat of paint? Don't write those items off either! The plate I used in this collage was $0.49 at The Salvation Army, it has a small chip on the edge, I picked up a plate hanger for $2 at Michael's that hides the chip perfectly. Easy peasy. The Georgia O'Keeffe still life is framed in a clear glass frame that was actually meant to go in a table top holder. I've never used it that way, but it doesn't have a hanging mechanism. The answer? Command velcro strips. Those things are MAGIC. 
After you have matched up your items, put aside the possible "no's" for later, made  list of ways to fix up the "problem children", etc. It is time to start working on placement for your collage. Don't worry, nothing is set in stone, it's time to play! 


Set the items that you want to use on your sheet of paper, these are most likely going to remain in your collage (though they don't have to!).

Look at the shapes, sizes, and colors of your objects:
  • Are they all the same size? 
  • Do they all have the same orientation? (vertical/horizontal)
  • Do they all have the same thickness of frame?
  • Look at the colors in the papers and frames again, what are you noticing?
Ideally, you will have a mix of sizes, shapes, colors, and frame thicknesses. But you will also be noticing some themes too. With mine, I noticed the repetition of gold and green, and that initially most of my frames were pretty thick. 

Go back to your "maybe" items, you know that pile you set aside earlier? Look at it with a new perspective, you have an idea of what you are looking for now. 
  • Fill in those gaps. For mine I needed to add some thinner frames, and more frames/pictures that could be hung vertically. I had too many horizontal ones. 
  • Does anything in your "maybe" pile have some of your repeating colors in it? I picked out a few pieces that had golds and greens in them that I hadn't noticed before. Now they really fit with my other choices. 
  • Are you noticing any themes within your "maybe" pile that you are still loving? I had several modern black and white pieces that I thought really clashed with the magical greens and golds, and old fashioned styles. But when I noticed that I had several items that were all black and white, I decided to pull them into my collage and try them out. It turned out that they didn't clash with the other items but made the spread more eclectic and balanced in it's own way.


Once you have taken a new look at everything, start placing them on your paper. Here are some tips to get you started:
  • Put frames of the same size and shape opposite from each other. You'll notice in my collage, most of my bigger frames are around the edges, and they are never lined up directly next to one another.
  • Spread items of similar colors out as you go across your paper. In mine I had a lot of green and turquoise pops, I started at one corner and tried to place them across the page.
  • Mix in your secondary color schemes. The ones from the "maybe" pile that you still love. For me it was the black and white. Our caricature was the largest piece, and the other two were pretty small. I played around with their placement but ultimately ended up spreading them across the page as well. 
  • Put similar frame thicknesses and colors apart from each other. I actually have the same frame in there twice. The thick brown one at the bottom right and left. I changed the orientation of one, and made sure it was across from the other one. The gold top center frame is a similar thickness, so it balanced them out well in the top middle. 
  • Put smaller items toward the bottom or edges. Small items can fit well anywhere, but I like them around the edges because they can balance out the shape of the collage without looking too out of place. We put most of our small pieces at the bottom.
  • Have fun! There is no one right way to do this! You can change it around as much as you want. Even as time goes by on the wall. :)

Hanging it up:
  • Once you love the way your collage looks, and it is ON your paper, trace around the edges of your frames. It's ok if some things go slightly off your paper, just trace the part that touches.
  • Once you have done all the frames, step back and take a picture to help you remember what was where.  
  • As you take each item off your paper, you can also write a note in it's place to note what was where.
  • After you have finished all of your tracing and labeling, tape your piece of paper to the spot on the wall where you want your collage to go.
  • One by one, look at the back of each item, and find where the nail will rest, and where it should go based on your tracing on the paper. Carefully nail each item in. For items that don't have a picture hook on the back, get creative. Our canvases are just sitting on the nails. The clear frame with the Georgia O'Keeffe that I mentioned above has command velcro strips attached to it. You can't see them because they are behind the picture. The frame at the top that looks like twigs is meant for a table top, but the nail fit in between the twigs and hangs just fine. You'll figure it out! 
  • Once all items have been nailed into the wall, carefully cut or rip away the craft paper. I found it much easier to hang one large piece of paper straight than to do the other version of this where you tape each individual shape up on the wall before nailing. Please recycle. :) 
  • Enjoy your amazing new wall collage!


What I Spent & Money Saving Tips:

Since I tend to collect paper, especially when we travel, I only had to purchase one item to go in a frame, the mat behind the "Better Lawns and Gardens" picture. It was $2 at Goodwill. I attached the picture to it with scrapbooking squares.

Similarly, I had a bunch of frames, so I didn't need to purchase any. Again, thrift stores are a great place to find these items! Especially on a budget. If I bought all of these frames at a thrift store, I think it would have cost between $25 and $30. SUPER CHEAP. :) Another option is estate sales, garage sales, and auctions where you can often get a flat of old frames, some with pictures in them for a small fee.


I spent $14 on this project, which means even if you had to purchase some frames or post cards, etc. it would still be an inexpensive project. :) 

I hope this tutorial answers some questions for you guys on the process, and how to design it. I hope it inspires you to create a collage that reflects you in your own space too. :) 

Please feel free to ask questions below!


Have you ever made a wall collage? 


What is your favorite home DIY you have tried?


Thank you for reading!


XO,


Alexandra

Monday, May 11, 2015

Springtime Hues // $38 Outfit!

Happy Monday! The sun is shining here. :) 

We've officially hit that phase of spring in Kansas where the rain and the storms hit. I really don't mind it. I don't particularly have a fear of storms, or tornadoes (I know you're thinking it - everyone who has ever seen the Wizard of Oz...).

I threw this on the other day, and I just love it. It's a little bit girly, a little bit bohemian, & really easy!


Blouse: Hand me down, from mom, $0
Jeans: Target, $20
Flats: Target, $8
Necklace: World Market, $10 (BOGO Black Friday Price)

Total: $38 (!)

I love that the color in the top matches my jeans, but it doesn't look too planned out. The long necklace and little bit of pattern mix keep it from being too stuffy as well.

What is your go-to easy outfit for spring?

Do you get lots of thunderstorms where you live this time of year?

XO,

Alexandra

Thursday, February 26, 2015

Pattern Mix + Firmoo Review

Howdy All, can you believe February is almost over?!?

It has been such a blur. Though it shouldn't be a shock that February felt just as busy as January was. I haven't had time to read any blogs in what feels like weeks!! Thanks for sticking with reading this, I promise I'll catch up soon! :)

I have been doing a really fun IG challenge called #StyleMeFeb with stylist @HilaryRushford, each day gives you a prompt and it has been a blast coming up with fun outfits. This is one of my favorites, and it happened to be from the day I got my Firmoo glasses in the mail.

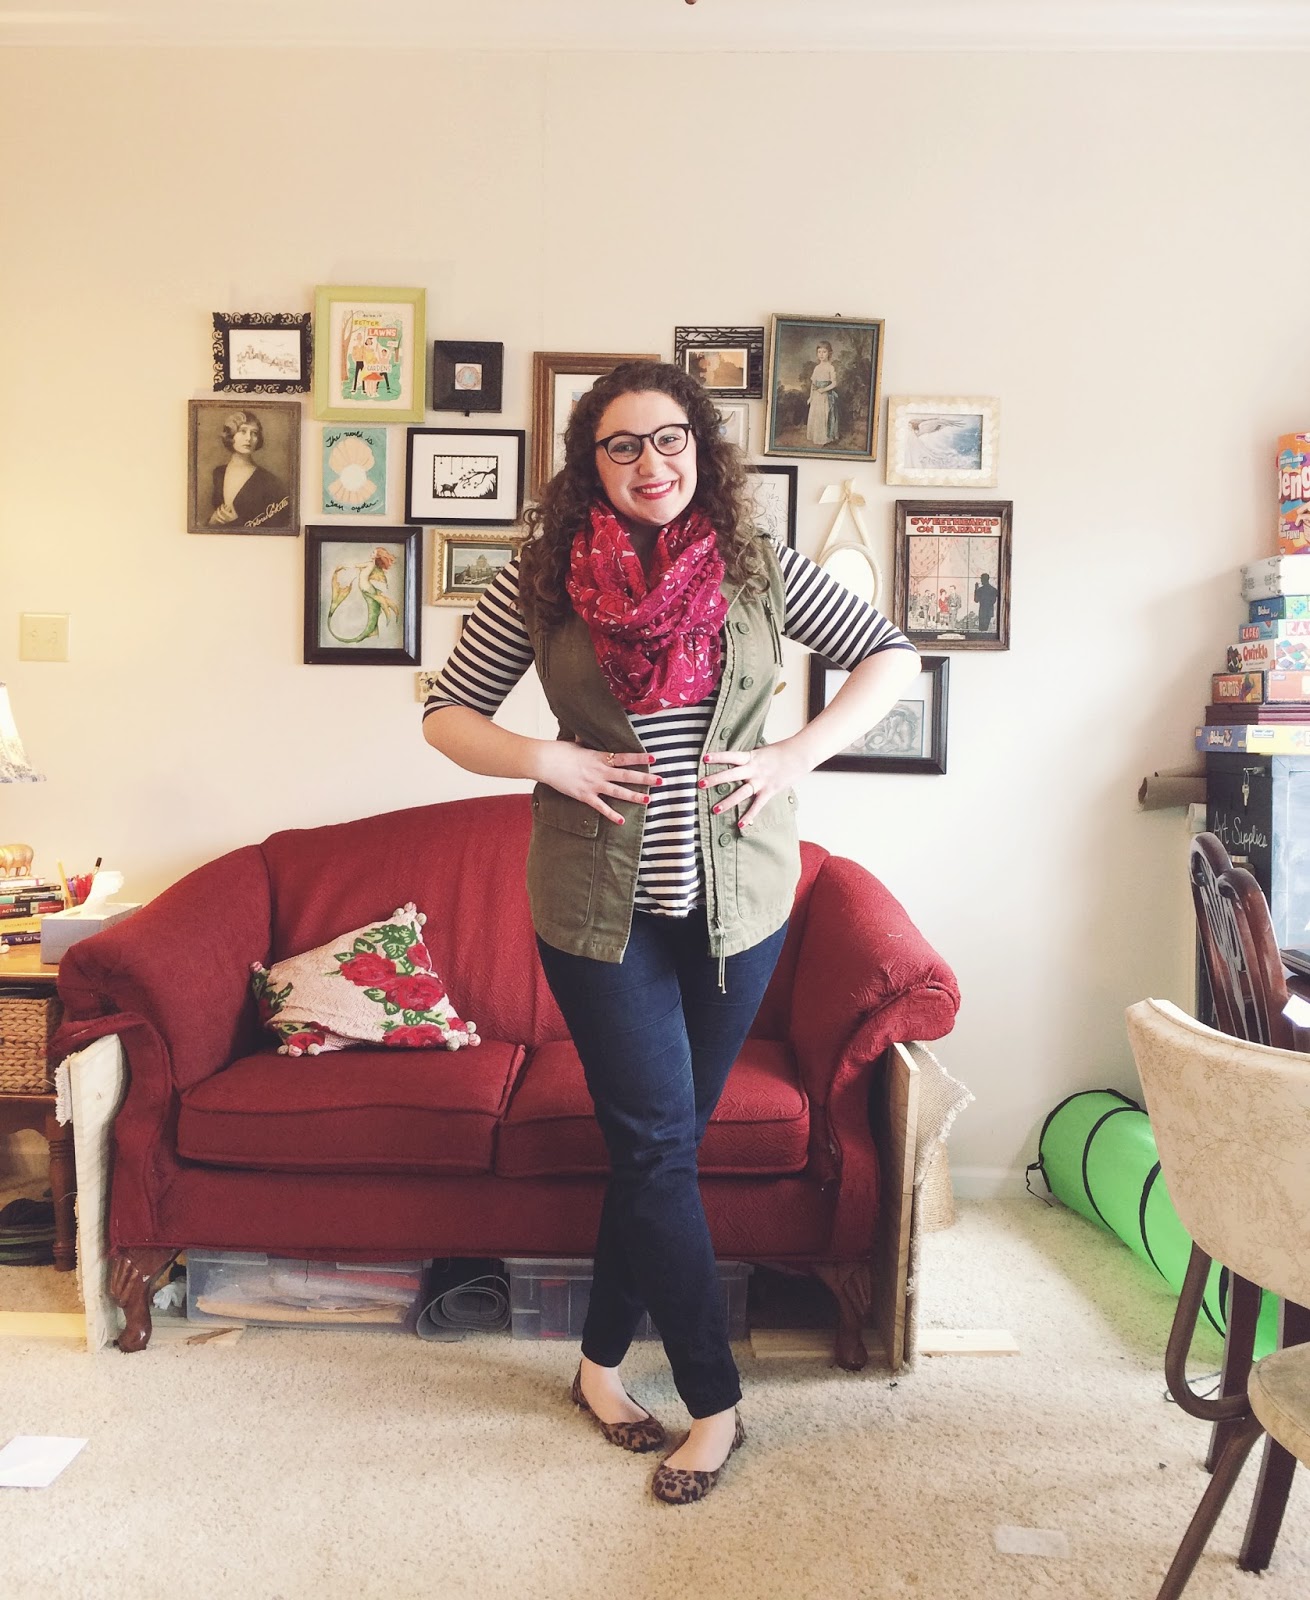
I just love this striped t-shirt with my utility vest. And since it's been rather chilly in my work place... I've been layering on lots and lots of scarves.

I love the way this one looks with the stripes. Finding a pair of clearance leopard flats at Target topped it all off. A steal at just $8!

Tee: TJMaxx, $20 - Old
Skinnies: TJMaxx, $16 - Old
Scarf: TJMaxx, $10 - Old
Vest: TJMaxx, $10, Clearance - Old
Flats: Target, $8, Clearance
Glasses: c/o, Firmoo

Total: $63
Recent Total: $18

A few weeks ago I got the chance to review a pair of glasses from Firmoo, being a girl who loves glasses... I was jumped at the chance! I used their custom online ordering system to find a pair that would look right on my face shape and size before ordering. Minus the fact that I always raise one eye brow.. can you see it? haha :) 

The online system is very cool. You upload a photo of yourself and enter your PDI (look it up here) and then you can see what it will look like on you. Once I figured out the PDI thing, and how to get my pictures to upload rotated the correct direction this tool was really useful.

I selected these round sort of frames, something unlike what I currently own, but in a tortoise - my go-to color. While ordering I was trying to verify that I was getting 'readers' and I must have spaced, and ordered burgundy instead. Oh, well. The customer service team was very helpful and said that I could review again sometime and get a tortoise pair. I hope so, the burgundy isn't my best color. Lemonade, right?

The glasses themselves are very nice, they are sturdy and come with quality protected lenses. Along with the glasses you receive a hard case, cleaning cloth, and toolkit. Very smart. :)

The prices are excellent and the shipping is quick! I would highly recommend using Firmoo, though I would caution you all to quadruple check your info before ordering, I found it difficult to edit the items in my cart! - I'm told this process is being improved. :)

Check out their First Pair Free Program.

What do you think? Have you ever ordered glasses online? Have you tried Firmoo?

What is your go-to pattern mix formula?

XO,

Alexandra