Showing posts with label scrapbooking. Show all posts

Wednesday, November 8, 2017

2016 Project Life Album (Part III) // Documenting

Happy Wednesday Friends! I hope that you are having a great week! I'm excited because tonight's #lybholidayl prompt is to "get your hygge on". Yes, please!

In December... I decided to do a 2016 Monthly Project Life Album. Maybe it's because I got a lot of documenting gifts, or because I also bought myself a lot of things...? Either way, I had a blast going back through my year and documenting it. I just finished the full album in May, so I'm excited to share the photos and (much shorter!) videos with you!

Check out Part I, here. Check out Part II, here.

Part II - July - September


I love how these pages turned out, I loved looking back on fun times, and I loved taking the time to document a quiet month. After a busy summer we really needed some time for self-care. Another reminder that you don't have to have "big" things to document. Even the smallest stories or moments are worth preserving.

I played around with some fun stamps, and just went with the flow. I made another pocket to put some extra photos in when I (again) printed too many! :P


Check out the videos to see all the pages and hear some of the details on the products/events that happened in September 2016. :)

Videos

July


August


September


I had so much fun making this album (well.. 2 because... too many pages! LOL), I can't wait to show you guys the rest as the year goes on. :)

See Part I of this album, hereSee Part II of this album, here.

To see the videos as they publish, consider following me on Youtube! :) 

How do you guys hang on to tiny special memories? 


Have you ever started a project WAY after the fact?


XO,


Alexandra


a

Wednesday, October 18, 2017

October Daily 2017

Hello Friends, I hope that you are having a nice week so far! I wanted to start by saying thank you for all of the thoughtful comments on Monday's post. It's never fun to talk about deep rooted issues in society, especially if it brings up painful memories for you, but I appreciate your support, your constructive comments, and this great community of bloggers! Love you guys!

Ok, on to today's post. :)

What are seasonal "Daily" albums?!

When I started doing Project Life, I loved watching videos to see other people's albums and processes. I noticed that many people were doing December Daily® albums. I initially thought, "oh cool, a Christmas themed album!" But it is really more than that. Ali Edwards's (the creator's) idea behind it, is to capture your story for the month, and your story every day. Some days it might be a big story, some days a little one. Other times it will just be a photo and the story is implied. However, the aim is to get you to focus on the reason behind the season of Christmas, and the "spirit of December" (as Ali puts it). Whether you're religious or not, it is easy to get sucked into the hustle and bustle of this time of year. I think it is so nice to have a moment where you can focus on the small moments, the important ones, and pause during such a hectic season. All sorts of documenting companies come out with supplies for this project, so it can be all done from a kit, or mixed and matched as needed! :) So customizeable.

Why I'm Doing October Daily:

I didn't do a December Daily® last year, but I plan to do one this year. Since I haven't done daily documenting before, I decided to also do an October Daily! I figured that practicing in October would give me some ideas as to what I wanted to do for December. I love October and Halloween almost just as much as I love December and Christmas! So I wanted to put the same idea behind the season of fall, and Halloween too!

A post shared by Alexandra Consolver (@simplyalexandra12) on


Specifics:

Size: Traveler's Notebook (new to me!) - ~4.25 x 8.5 inches - I made mine using the papers I bought + black and white card stock. I used this method to make them. Because the paper is thick, it will take two notebooks of this size for the month.

Supplies: Pink Paislee's "Spellcast" range, see haul video below, + lots of orange, black, white, and gold (from my stash) - ok a few purchases..

Method: Capture one story every day. If I don't have a particular story to tell, at least share a photo, if I don't have a photo, capture something related to the season (a quote, a list, favorites, etc.) Intersperse a few sections that aren't related to a specific day. Ex. One page just has our fall decor on it. I keep a note in my phone of approx. what I did each day, so I can catch up as needed. I tend to write it out and map out what photos I need to print. Since the pages are smaller, I usually have to print 2+ day's worth of photos at once. I don't want to waste paper! (btw, my Canon Selphy is so perfect for this daily type of project. I LOVE how easy it is to print as I go!)


How it's going:

Before this I have only done 6x8 albums, and mostly in pockets (as you guys have seen! ha), so at first it was a bit tricky to get into this new size! I had to do a few practice pages just to play around with spacing, etc. Once I started going it got a lot easier, and now I am having a blast with it! :)


I also had trouble at first including some of the stickers, etc. I was being really literal about it... but I'm getting a bit better at it as I go. Adding those little bits, even if the story isn't about pumpkins, or witches, etc. There's no point in hoarding these supplies, I bought them for this album!


I've recorded the entire process of making this album so far, so check My YouTube next week if you are interested! :)


I'm having so much fun with this, that I kind of want to do one for November. Maybe make it gratitude themed... The only question then is... do I still do my normal documenting for these months? I think I probably will.. because it will bother me not to, but I won't feel compelled to have EVERY SINGLE PHOTO in there, which is something that I struggle with. haha

Thoughts on This Year's December Daily®:

I will definitely be doing an December Daily® this year. I have all of my supplies, minus a binder (depending on what size I choose). I am super excited about it. The only question is... what size?!?! The Traveler's Notebook size is super fun, but I may want to try a 4x4, or go back to a 6x8. Decisions, decisions. hehe

"Spellcast" Haul:


What do you guys think of the idea of a daily album? 

How do you capture the spirit and festivity of a season or holiday? 

What are your traditions?! - I'd love to know!

XO,

Alexandra

*this post contains affiliate links, if you purchase I might get a few cents. ;) As always, I share my true opinions with you all, and only link in items I am legitimately crazy about/using.*

Wednesday, September 20, 2017

Travel Documenting: Tips for Creating an Album You Love // With Shea Lennon

Back in July I had the opportunity to meet a blogger friend of mine IRL. Shea from Shea Lennon lives nearby and it was so fun to finally meet up! She had recently taken a family trip, and wanted to document it. So we got coffee (thanks for paying for mine when I forgot my new card, Shea!) and chatted about life and some methods for documenting it. :)


We decided to collaborate by each documenting our 2017 travels in an album and then sharing them with you guys! This is her very first PL album, and I'm super jazzed to share it with you guys! :) Here I'm sharing my album and tips, as well as what Shea would like to do differently next time. Make sure to hop over to Shea's post to see her album and what she learned during the process, and what I'd like to do differently next time!


My Travel Album Tips:

Simple is better!


For my own albums, I like keeping the embellishments simple. I want the focus to be on the photos. Which works out well, because it makes it less time consuming! I stuck to washi tape, white cardstock, and stamps for the most part with this album! I used a few cards here and there, but my use of stickers, 3D embellishments, alpha is low! I love how simple and cohesive it makes it look!

Hide your journalling, and still record the stories!


I do this in all my albums... but I don't always love the way my writing looks. I'm tempted not to journal at all, but telling those little stories is so fun. If you're like me and you don't want your writing front and center, hiding it on a tag or card behind a photo or in a pocket is a good way to go! I like to put a paper clip, tab, string, etc. on it sometimes to remind me that it's hiding there!

You won't love every page, and that's ok!

Not every page will turn out perfectly, not every page will be your favorite. Leave it alone and come back to it later, or don't. It doesn't need to be stunning. The most important part is documenting your memories! :)

Hang on to paper mementos!

When you travel, pick up business cards, maps, tickets, post cards, stickers, etc. and use them in your albums. You never know when you'll have a fun place to re-use those items. If I have any leftover, just stick them in an envelope/bag and punch holes in it. That way you can keep those extra items together. This is also a good place for extra photos if you've printed too many!

Interested in seeing the process for making these pages? Check out my full process video!


Ideas for Next Time:

I have these posted over in Shea's post, so go check out those ideas and her awesome Minneapolis travel album! I love how hers turned out and that she took the plunge in making her first album! 


Shea's Ideas for Next Time:

Hi Simply Alexandra readers! I'm Shea from Shea Lennon and I love to share posts about style, books, and life as a busy working mom on a budget. I'm new to Project Life but I had a lot of fun creating an album for our recent trip to Minneapolis. I'm happy with how it turned out, but there are a few things that I plan to do differently for my next album.

Be more intentional about choosing an album size. I honestly got so overwhelmed by all the albums out there that I got tired of looking and just grabbed one. I didn’t really consider what that would mean for the size of pages that would fit inside and, therefore, what size photos it would hold. It ended up working okay, but next time I may try a different size.

Take and print more photos. I wish I would have taken more photos of little, everyday moments on our trip. I'm glad I got some good destination photos, like our trip to the zoo and to Target field, but I wish I would have included more photos of meals we loved and random, funny pictures of the kids. I would rather have more to choose from and have extra photos than to feel like I didn't quite have enough.

Be a more thoughtful photographer. I don't like spending a vacation behind a camera (or, more likely, my iPhone), so I tried to quickly snap photos and be done with it. However, as a result I had a lot of photos that were poorly lit, had a lot of background clutter, and just in general were kind of crappy. In the future, I'd like to take just a few more seconds to make sure I'm getting a good photo before I start snapping. And then I'll put the phone away.

Take home free keepsakes to add to album. I wish I would have saved some restaurant menus, maps, and other free items from different destinations to add to my album. I will try to remember to do that on our next trip.

Again, go over and say hi to Shea, she's an awesome blogger, and her album is so much fun!

Overall, I'm really happy with how my New Orleans section of my album came together. It was a lot of fun to go back to a super simple documenting style! I'm enjoying documenting our Dakotas trip the same way, and NYC once we get home! :)

Anyone feel inspired?! Her album has me itching to document something else! :)

Thinking about taking the plunge to make your first album?! Check out:

Headed to NOLA Yourself?! Check out my recaps for recommendations: April 2017, January 2015, and March 2014.

See my 2016 travel sections: Houston & GalvestonSan FranciscoGeorgia,Nashville, and Las Vegas

Anyone taking a fun trip anytime soon? I'd love to live vicariously through you! :) 

XO,

Alexandra

Wednesday, September 13, 2017

2016 Project Life Album (Part II) // Documenting

In December... I decided to do a 2016 Monthly Project Life Album. Maybe it's because I got a lot of documenting gifts, or because I also bought myself a lot of things...? Either way, I had a blast going back through my year and documenting it. I just finished the full album in May, so I'm excited to share the photos and (much shorter!) videos with you!

Check out Part I, here.

Part II - April - June


I love how these pages turned out, I loved making the shaker pockets to begin each month. The April one was really fun with peach to lilac ombre paper used with a punch to make little blossom confetti. So pretty! 

I made quite a few pockets this time that were an envelope with something on the front (a card or other paper memorabilia) and then put the over-printed photos from and event or extra paper items inside the envelope. That really helped save some space and also mix up the book. Everything is not in a page protector, and you can open it up and explore it which is fun! :) 

Check out the videos to see all the pages and hear some of the details on the products/events that happened in early 2016. :)

Videos

April


May


June


I had so much fun making this album (well.. 2 because... too many pages! LOL), I can't wait to show you guys the rest as the year goes on. :)

See the first Part I of this album, here.

To see the videos as they publish, consider following me on Youtube! :) 

How do you guys feel about glitter? I love it, but KC calls it the STD of Christmas... lol. 

Have you ever started a project WAY after the fact?

XO,

Alexandra

Monday, August 21, 2017

2016 Project Life Album (Part I) // Documenting

In December... I decided to do a 2016 Monthly Project Life Album. Maybe it's because I got a lot of documenting gifts, or because I also bought myself a lot of things...? Either way, I had a blast going back through my year and documenting it. I just finished the full album in May, so I'm excited to share the photos and (much shorter!) videos with you!

Part I - January - March


I love how these pages turned out, I loved making the shaker pockets to begin each month. I loved playing around with "normal" Project Life since I had only done travel albums before this. Overall, I just had a lot of fun with this! :)

Check out the videos to see all the pages and hear some of the details on the products/events that happened in early 2016. :)

Videos

January


February


March


I had so much fun making this album (well.. 2 because... too many pages! LOL), I can't wait to show you guys the rest as the year goes on. :)

To see the videos as they publish, consider following me on Youtube! :) 

I hope you guys had a good weekend, I read ACoTaR ALL WEEKEND LONG! :) 

What did you guys do this weekend? 

Have you ever started a project WAY after the fact?

XO,

Alexandra


Wednesday, August 16, 2017

How I Size & Print My Photos for Project Life

Happy Wednesday, everyone! Thank you so much for your recommendations on NYC. I can't wait for our trip!


Today I wanted to share a video tutorial on how I size and print my photos, all at home, all from my phone. This is useful for project life, but it is also good for other types of documenting, or just small photos to display at home or at work.

As I mentioned in my How to Start a Project Life Album // Essential Supplies and 9 Reasons You Shouldn't Start Project Life (and Why They're Not Good Enough) posts, a big part of my documenting success, was printing my own photos. I knew I would not have the time to schedule runs to a store that prints them, I didn't want to be ready to document, but waiting on prints in the mail, and I didn't want prints stuck in our mailbox (getting stuck together in the heat!) or in our apartment's office, locked, because we rarely made it there when they were open... etc. 

So, I bought this printer, and I have not looked back. Watch the video for a quick tutorial on sizing and printing. If you don't print at home, you can still use this sizing tutorial to save money on your prints that you order, or pick up in store.


Supplies Used:

Smartphone + Wifi
Pic Frame App - $1.99 in app store
Canon Selphy - http://amzn.to/2uQDS2y
Canon Selphy Ink & Paper - http://amzn.to/2h5HAzx
Paper Cutter - http://amzn.to/2gXUHCT


So there you have it, my easy method to size and print your photos at home. Like I said, using this method has been a lifesaver for me! It makes it possible for me to document when I find pockets of time, and it makes it even easier that I can do it all from my phone!

I am hoping to start using it to print photos to frame around the house and to take into the office sometime soon. I don't have enough photos on display these days!

Do you think you are more of a print at home person? Or a order prints person?

Do you have a lot of photos/family photos in your home? If not, do you have goals to add some?

(I'm not great at displaying our photos in our home! I'd like to change that! :) 

Thank you for reading & watching! If you use YouTube, please subscribe to my channel! :) 

I have been posting twice a week on my YouTube channel. From tutorials, to flip throughs, to process videos, check those out for some inspiration! 

XO,

Alexandra

Monday, July 24, 2017

Getting Started With Project Life // Why You Should Try It! // Yes, You Can!

Happy Monday Friends! I hope that you had a great weekend!

If you read my last post, I explained the basic supplies you'll need to start Project Life, so check that out if you're ready to shop! Today I am talking about excuses and motivation!

There are so many reasons you should try project life, and also so many reasons you might think you shouldn't! Here are a few thoughts I have (or had) as I started and continue with PL!

What's Your Excuse?!

Believe me, I had them too! But once I started, I loved it, and got into a rhythm with documenting. I worked my way "up" through the levels of documenting as I had time and supplies to do so. Sometimes all you need to do is debunk your own excuses! So, what's yours?


"I'm not creative enough!"

Yes you are! The best thing about project life is that you can start with the basics and work your way up, or not! You can decide how much work you want to put in, and how creative you "need" to be. Project Life is about documenting your memories and your life! It's not about creating stunning art. You should make it how you like it, and at the level you are comfortable with! :) I personally found that using the project life method has made it easier for me! It's so much easier to fill each small pocket than to make a 12x12 page look coordinated. I think that many people find it "easier".


"I don't have time!"

Project Life does not need to be time consuming! Like I said before, it only takes as much time/creativity as you want to put into it. There is no need to spend hours on your album, unless you are able and/or WANT to. With the basic supplies ready (photos printed, etc.) all you have to do is place your items in pockets. Seriously, you can stop there. That can take as little as 5 minutes! Even if you add embellishments, it can take as little time as you need! I like to multi-task by working on it while we watch Netflix. The biggest hurdle with time, might be making sure that you do what's easiest for you in terms of photos! For some it will be easier to order them online and have them shipped. For others, you may want to pick them up 24-hour photo style. For me, I needed to be able to print them at home. Think about what will work best for you, having those photos ready is the key to success!

"... but I'm seriously busy!"

Oh boy, guys! This was me. 100%. What I found out is that when I spent a bit of time working on it, even when I "didn't have time"... the more I found that I did have time! I also found that unlike other plans and hobbies, project life, and working with my hands reduced my stress. That stress that comes from being so busy! It's a win win guys!


"I don't have anything exciting to document!"

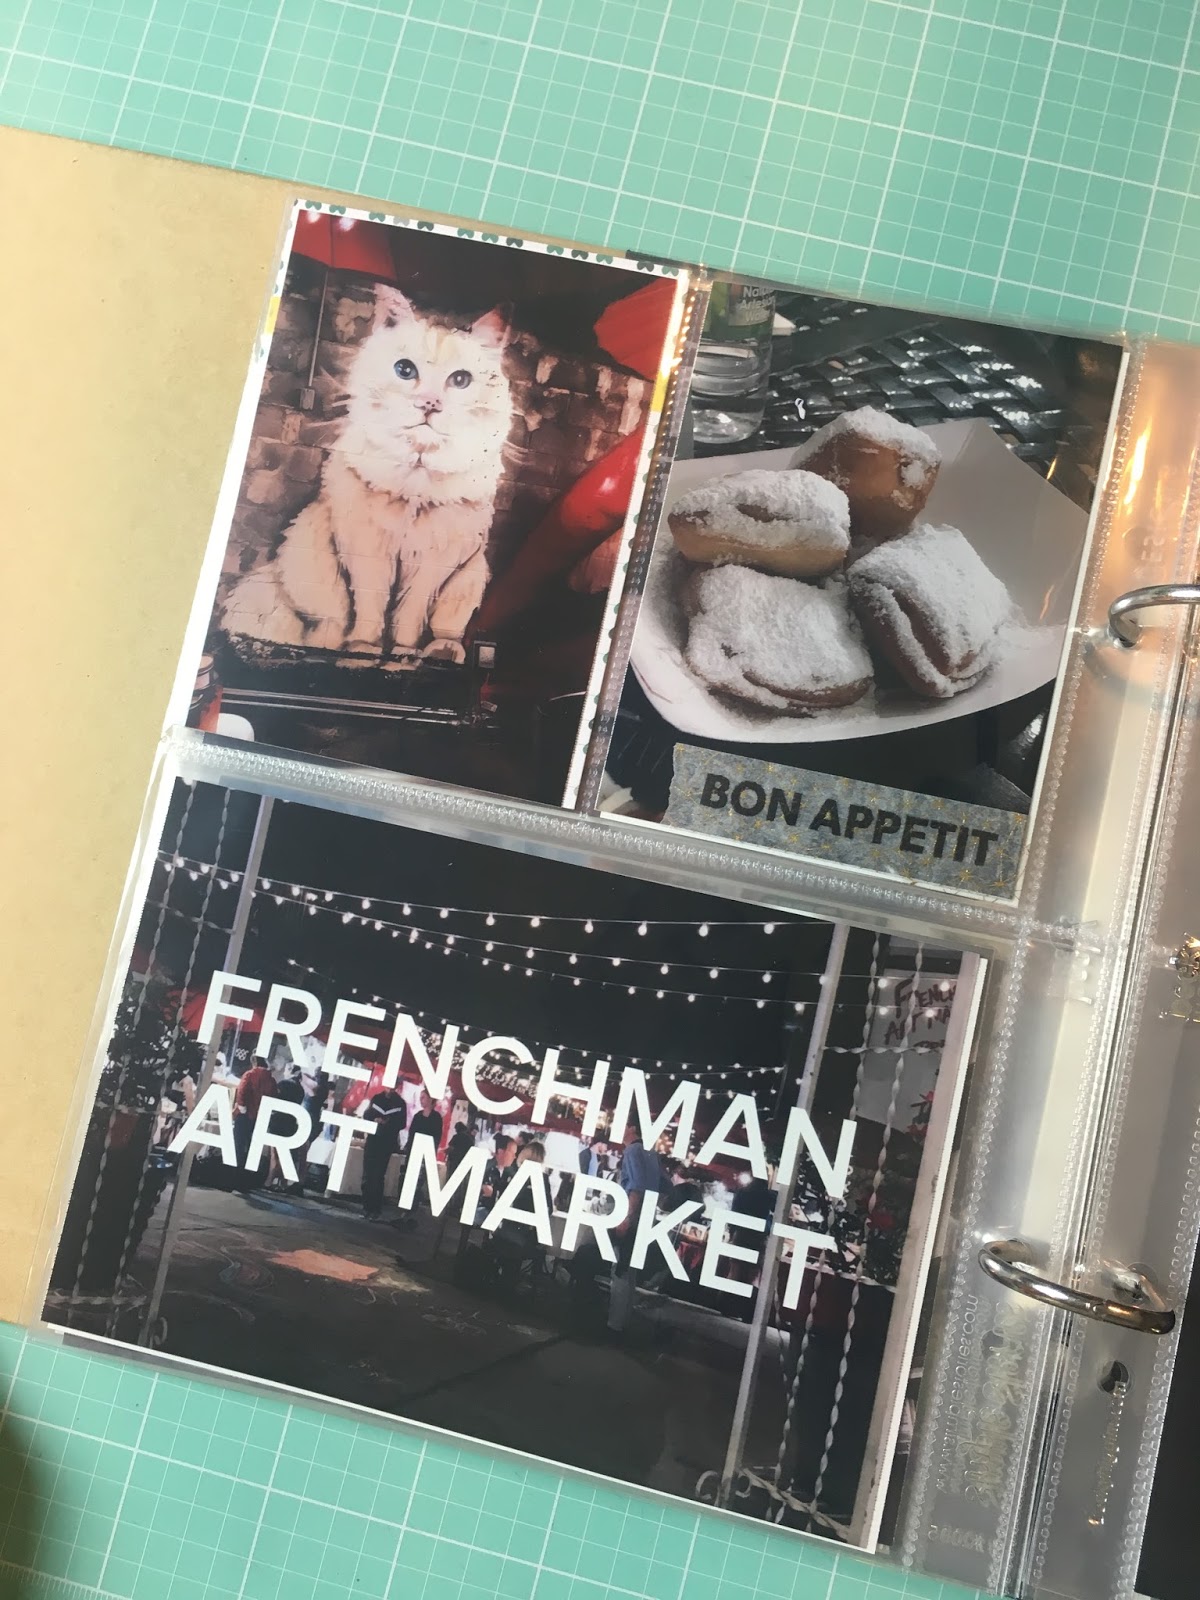
Some of my very favorite moments are the tiny ones, and I find that when I'm photographing them, and documenting them, it's an exercise in gratitude. I love looking back at those little cuddly cat moments, when KC does something small but comforting for me (shelling my peanuts at restaurants), etc. it can be so nice to look back on those moments! What you are reading, what you are working on goal-wise, your daily struggles and triumphs ARE part of your life. Don't feel like they aren't worth documenting! Your story is worth telling, no matter what you are doing.

"I don't have enough money to scrapbook!" / "I don't know where to start!"

These are kind of related thoughts in my mind. it is easy to imagine that you need a ton of supplies and therefore money to start project life. If you haven't seen my last video, that should clear up a few things as to what you "need" to get started. In all actuality, it's really not that many supplies. You can also start stocking up bit by bit. You can purchase items one by one at your craft stores with coupons as you go. Both Michael's and Hobby Lobby have weekly coupons in their apps. Going back to some of the topics above, you really can start with just a binder, page protectors, some photos, and some type of paper or cards. Getting a starter kit like a Becky Higgins kit at a craft store will include everything you really need. Plus if you REALLY want to add more later, you can do it later! As you get more supplies you can go back to "finished" pages and embellish more!

"I don't have enough photos!"

I've actually noticed that some of my favorite PL pages are ones that include less photos! You can use filler cards, paper, mementos like tickets, and other supplies to round out your pages and albums!

"I don't want to start until I have everything!" / "I don't want to make an album that I won't like!"

When I started my first album, I used a very very small stash of supplies. Basically my album, page protectors, photos, an old kit, a washi tape, and one stamp set. It was enough. As I got more into the process, I added new supplies here and there. When I went back through my first pages, I could easily add more to them with my new supplies. You don't ever have to be "done" if you aren't ready to. Chances are, you'll love seeing anything printed and created by yourself, it doesn't really matter exactly what it looks like. It won't need to be perfect.

So there you have it, a few excuses de-bunked and therefore a few more reasons you should start your Project Life album!

In all actuality, Project Life is probably not for everyone, but I DO think that preserving your memories and telling your story is important. Whether you do that in a journal, a photo book, videos, traditional scrapbooks, etc. Tell your stories folks, they're so important!

I'm planning more of these posts, but let me know what thoughts and questions you have! What do you want to know?

I'd love to help you get back on the documenting journey. (Or start one!) I think that it can be fun and easy for EVERYONE!

I shared my first five PL videos recently: Houston & GalvestonSan FranciscoGeorgiaNashville, and Las Vegas. Check those out! To learn about the process, supplies, etc. for my other sections, you can watch my videos. :)

XO,

Alexandra